For potters curious about my methods, and anyone with an interest in the ceramic process.
Concept
I like to stay open to happy accidents and new ideas along the way, but my most successful pieces start with a clear concept.
Throwing
At this stage, I’m already making choices about the finished product. Will the pot have a shallow or deep foot? Do the walls need a little extra thickness for more textured carving? Where will the handle go? And for wood-fired work, how much of the surface will be left bare so you can see the effects of the firing?
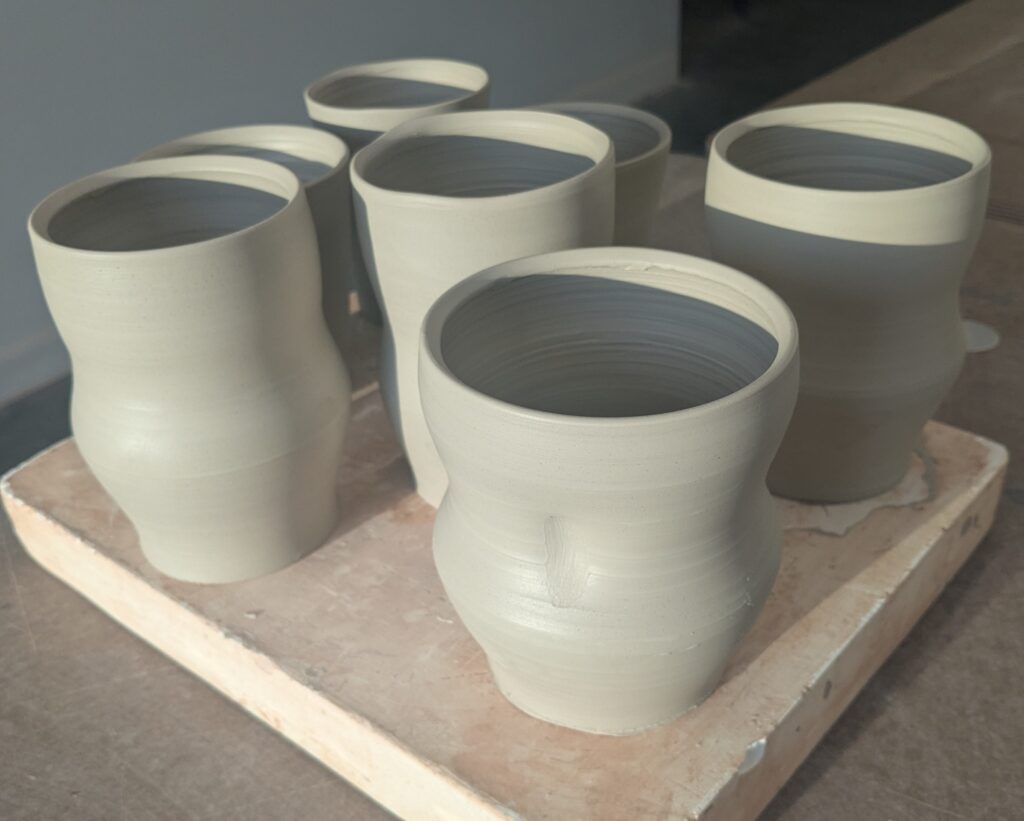
After throwing, I put the pieces on a plaster bat and leave them in a damp box to firm up.
Trimming
The next step is trimming. It’s important for the cross-section to be even all around to prevent cracking and make the piece comfortable to pick up. I tap with my tool to gague the thickness by sound and take the piece off the wheel to check the walls with my fingers.
Once the foot is trimmed, I use a firm rubber rib to leave a smooth finish. Especially with how busy the finished surface will be, a polished foot ties everything together. This is where the piece starts to come to life.
Handling
Mugs get handles right after trimming. This step has probably taken the longest for me to refine. Everyone has their own way of making handles, and the method I use now is a mashup of different methods and tips from other potters. But essentially, pulling off the pot.
I take my time shaping the top of the handle, and gently roll its edges on the table for definition where the handle meets the pot. Functionally, this also makes a small divet for glaze to pool into and reinforce the joint.
At this stage, it’s vital to control how slowly the piece dries to prevent cracking.
Decorating
My favorite part! Once the piece is leatherhard all over, I either paint it with underglaze or dip it in slip. Then, the surface needs to dry a little bit but not too much.

I use a variety of tools, including small trimming tools, glorified dental tools, and a sharp blade to freehand the design.
Maybe it starts with a big swooping wave that gets smaller towards the bottom. If there’s a handle, I usually start around there to set myself up for thoughtful incoporation of it into the design.
As I work, I’m also thinking about how the size and direction of the shapes can exaggerate the proportions of the form or direct your eye, similar to fashion.

There’s usually a point at this stage where I get stuck: my hand slipped, the surface is getting too dry, or a shape just isn’t working.
This is where a piece can become really unique, since the only solution is to try new things and make small tweaks to get it right. When it works out, it feels inspiring to see new possibilities created from the small handful of motifs that I start with. This is one thing that’s really special about patterns.
Bisque Firing
I bisque fire to cone 04. Clay is at its most fragile when it’s bone dry, so loading the kiln is a balance of handling the pieces carefully while packing as many pots in as possible.
Glazing
Before reaching for any buckets (often after unloading the bisque kiln), I lay all the pieces out and sort them into groups by glaze. That sets me up to work in batches.
Then I work one batch at a time, pouring glaze into the piece, swirling it around, and pouring the rest out. I let that dry while I keep working, and then come back to it to dunk the rim. Any unwanted drips, splashes, or thick spots get scraped off with a metal rib into a cup of water.
Firing
Finally, ready for firing! Especially with an atmospheric firing, this is a huge mindset shift from the rest of the process. I’ve worked really carefully, and now it’s not entirely up to me what happens next.

The wood firing takes 6 days from start to finish. First is buiding the shelves and loading everyone’s pieces in, taking care that nothing is touching and everything feels stable.
Everyone in the firing takes shifts to load wood into the chamber, stoke, monitor and log the temperature. It’s important to gain temperature at a controlled pace especially in the beginning to prevent cracks and explosions.

It takes 2 days to climb up to cone 10, at about 2380°F. At the end, salt is added directly into one side of the kiln, which vaporizes and creates a distinctive sodium-silicate glaze.
After a few days of cooling, the kiln bricks come down one by one and the pots are carefully unloaded. Shelves get taken down and grinded, wadding is removed, posts are put away, and everything is left ready for the next firing. Pots get passed around, hopefully there’s lots of oohs and ahhs, and it’s all wrapped up.

Epilogue
After any firing but especially wood firing, quality control and cleanup is crucial. Every piece is carefully inspected for structural integrity, glaze drips, and leftover wadding.
The bottom of each piece is wet sanded so it’s smooth to the touch and won’t scratch your table.
If there’s a big glaze drip or extra wadding stuck on the foot, a rotary toolkit helps with cleanup. It’s slow and careful work, because one slip of the tool can ding a pot that’s taken so long to become a finished piece.
Finally, I rinse off the dust, and decide that I hate it take a moment to appreciate my efforts, noting the details that I want to repeat or do differently next time. But every piece that makes it this far is a small miracle.